Easy Cardboard Tube Flying Bee Origami Craft
Cardboard Tube Flying Bee Crafts are such a fun and adorable project! Imagine a plump, fuzzy bee, ready to buzz into action, with bright yellow and black stripes and delicate, translucent wings that seem to shimmer. We’re going to transform a simple cardboard tube into this charming little creature, perfect for little hands to make and enjoy.
This craft is ideal for complete beginners and kids of all ages, and it’s also a fantastic idea for making handmade gifts or a delightful decoration for a child’s room. You can expect to have your buzzing buddy finished in about 30-45 minutes. In this tutorial, I’ll guide you step-by-step through shaping the tube, creating those iconic stripes, and attaching those beautiful wings, so you can feel proud of your very own flying friend!
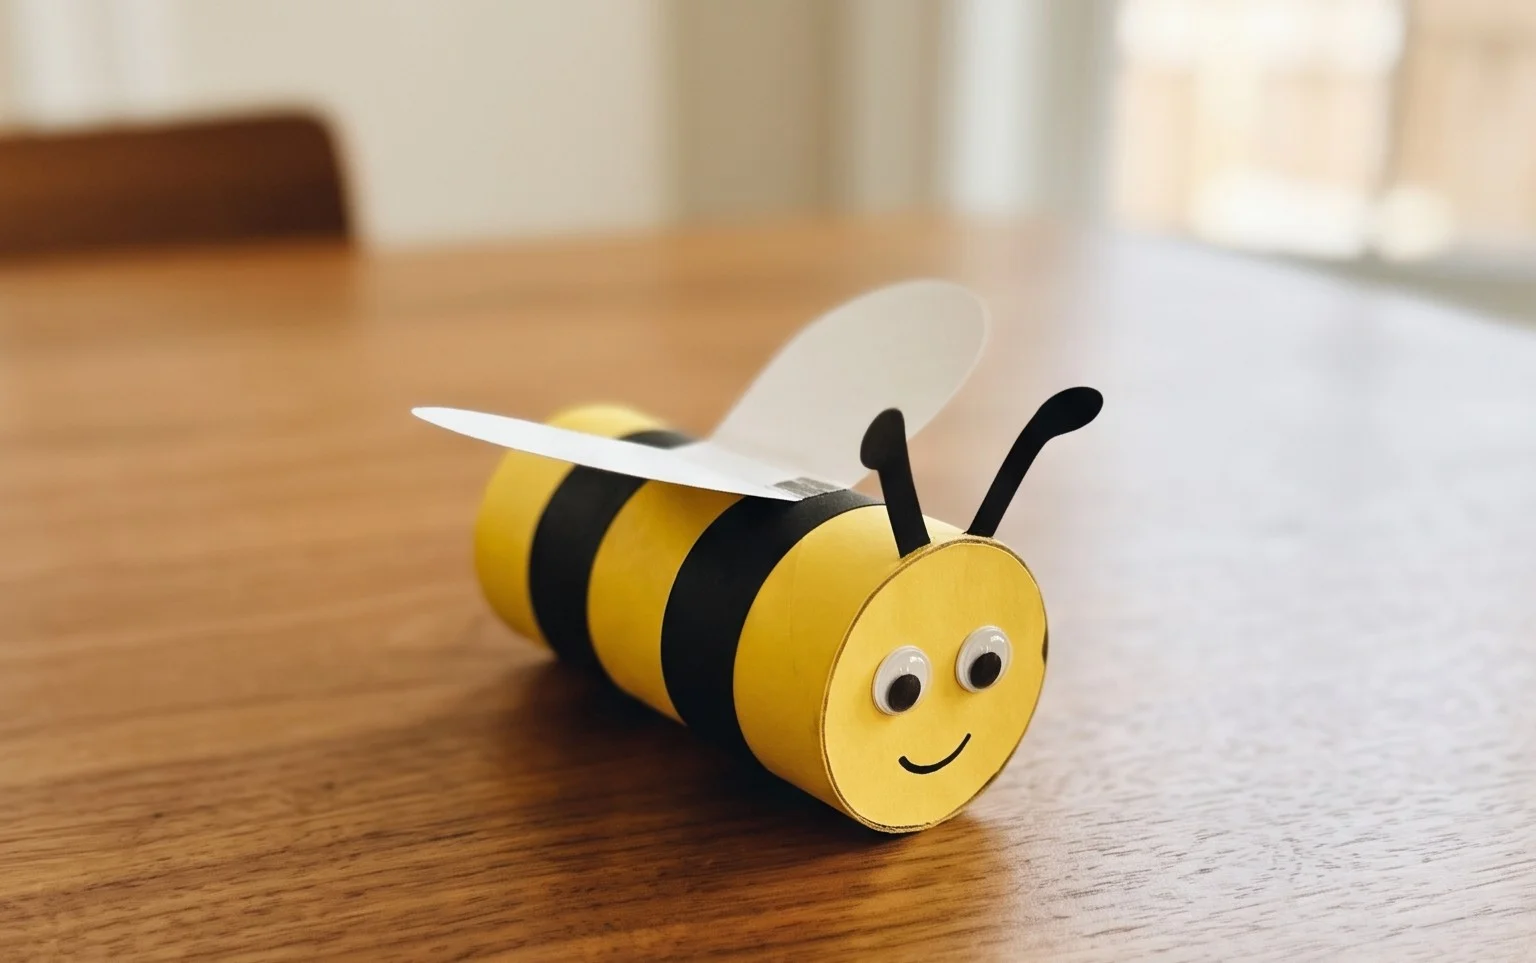
Welcome to our fun origami adventure! Today, we’re going to transform a simple cardboard tube and some paper into a charming flying bee. This project is perfect for crafters of all ages, and even if you’re completely new to origami, you’ll be able to follow along. We’ll take our time, explain each step clearly, and by the end, you’ll have a delightful bee ready to buzz around!
Choosing Your Paper and Preparing Your Tube
The paper you choose is the heart of your origami creation. For this bee, we want paper that’s sturdy enough to hold its shape but also foldable.
Paper Type and Weight
I highly recommend using standard origami paper. This paper is specifically designed for folding, it’s thin yet strong, and it usually comes in beautiful colors. If you don’t have origami paper, regular copy paper is a decent alternative, but it can be a bit stiffer to fold. Cardstock is generally too thick for this model.
Paper Size and Sidedness
For this particular bee, a square piece of paper that’s about 6 inches by 6 inches (15 cm by 15 cm) is a great starting point. This size will give you a nicely proportioned bee when combined with your cardboard tube. Whether your paper is single or double-sided is entirely up to you and the look you want! If you use single-sided paper, you’ll see the white or colored back of the paper on some parts of the bee, which can create an interesting contrast. Double-sided paper will give you a more uniform color throughout. For a classic bee look, I often use yellow on one side and black on the other, but feel free to experiment!
Preparing the Cardboard Tube
The cardboard tube will be the bee’s body. A standard toilet paper roll or a cut piece of a paper towel roll works perfectly. Make sure it’s clean and dry. You might want to lightly sand any rough edges, but it’s not essential.
The Base Folds: Building the Bee’s Head and Wings
Before we start folding the paper to attach to our tube, we need to create a couple of fundamental shapes. These are the starting points for both the bee’s head and its wings.
The Water Bomb Base (for the Head)
This is a common and very useful base in origami. To make it, I’ll describe it assuming you’re starting with a square piece of paper, colored side down if you’re using single-sided paper.
1. **Diagonal Fold:** Bring the bottom right corner up to meet the top left corner. Crease firmly along the fold. You now have a triangle.
2. **Unfold:** Open the paper back up to its original square shape.
3. **Other Diagonal Fold:** Now, bring the bottom left corner up to meet the top right corner. Crease firmly. Unfold again. You should see two creases forming an ‘X’ on your paper.
4. **Horizontal Fold:** Turn the paper so one of the points is facing you. Bring the bottom point up to meet the top point. Crease firmly.
5. **Unfold:** Open the paper back up.
6. **Vertical Fold:** Turn the paper 90 degrees. Bring the bottom point up to meet the top point again. Crease firmly.
7. **Collapse the Base:** This is the trickiest part, but don’t worry, we’ll take it slow! Hold the paper with the two horizontal and vertical creases visible. Gently push the left and right sides inwards, towards the center. The paper should naturally want to collapse along the diagonal creases. As you push the sides in, the top point will come down to meet the bottom point. You should end up with a smaller square, with four flaps. This is your Water Bomb Base. Make sure all your creases are sharp.
The Kite Base (for the Wings)
This base is simpler and is perfect for creating the wings. Start with your square piece of paper, colored side up.
1. **Diagonal Fold:** Bring the bottom right corner up to meet the top left corner. Crease firmly. You now have a triangle.
2. **Unfold:** Open the paper back up to its original square shape. You’ll have one diagonal crease.
3. **Fold Sides to Center Crease:** Take the bottom right edge and fold it inwards so it aligns perfectly with the diagonal crease you just made. Crease firmly.
4. **Other Side:** Now, take the bottom left edge and fold it inwards so it also aligns perfectly with the diagonal crease. Crease firmly. You should now have a shape that looks like a kite.
Numbered Walkthrough: Creating Your Flying Bee
Now that we have our bases, let’s put it all together to make our bee! We’ll use the Water Bomb Base for the head and create wings separately.
Part 1: The Bee’s Head
We’ll use the Water Bomb Base for the head. Remember, it’s that smaller square with four flaps.
1. **Prepare the Base:** Take your Water Bomb Base. Make sure it’s oriented so the closed point is facing upwards. You should see four flaps pointing downwards.
2. **Fold the Top Layer:** Take the top layer’s bottom right flap. Fold its bottom edge upwards so it meets the horizontal crease line in the center of the square. Crease firmly.
3. **Other Side of Top Layer:** Now, take the top layer’s bottom left flap. Fold its bottom edge upwards so it also meets the horizontal crease line in the center. Crease firmly. Your top section should now have two little flaps meeting in the middle.
4. **Fold Down the Point:** You’ll see a small triangular point formed by the two flaps you just folded. Fold this point downwards, over the top of those flaps. Crease firmly.
5. **Repeat on the Back:** Turn the entire model over and repeat steps 2 through 4 on this side. You should now have a shape that looks like a diamond with a little flap on top.
6. **Shape the Head:** Now, we need to make this diamond a bit more head-like. Look at the two points at the top of your diamond. Gently pull these two points apart slightly. As you do this, the paper should naturally start to curve inwards. We want to create a rounded, head-like shape. This might take a little gentle manipulation. The goal is to have the sides of the diamond curve inwards, forming a softer, more bulbous shape.
Part 2: Attaching the Head and Creating Wings
1. **Prepare the Wings:** Take your Kite Base. We’re going to turn this into wings.
2. **Fold the Kite in Half:** Fold the Kite Base in half, bringing the right side over to meet the left side. Crease firmly. You should now have a long, narrow shape.
3. **Fold in Half Again:** Now, fold this long, narrow shape in half again, bringing the left side to meet the right side. Crease firmly. This will create a smaller, thicker piece.
4. **Create the Wings:** Gently open up the last fold you made. You should see a crease running down the middle. Take one of the outer edges and fold it outwards, away from the center crease, at an angle. Repeat on the other side, trying to make the angles as symmetrical as possible. These are your wings!
5. **Attach the Head to the Tube:** Take your prepared bee head. Gently insert one end of the cardboard tube into the opening at the bottom of the head. You might need to slightly widen the opening of the head or squeeze the tube a little. Once it’s in place, you can secure it with a tiny dab of glue or tape on the inside if you wish, but often it holds quite well on its own.
6. **Attach the Wings:** Now, take your folded wings. You can attach these to the sides of the cardboard tube. I usually position them a little way down from the head, on either side, to give the appearance of flying. A small amount of glue or tape will work perfectly here.
Part 3: Finishing Touches
1. **Antennae (Optional):** For a little extra detail, you can cut two very thin strips of black paper or use black marker to draw antennae on the top of the bee’s head.
2. **Stripe Details (Optional):** If you used single-sided paper, or if you want to add more definition, you can use a black marker to draw stripes on the cardboard tube body.
3. **Eyes (Optional):** Small googly eyes or dots drawn with a black marker can bring your bee to life!
Common Beginner Pitfalls and How to Avoid Them
It’s completely normal to encounter a few tricky spots when you’re starting out. Here are some common issues and how to navigate them:
Pitfall 1: Sloppy Creases
* **The Problem:** If your creases aren’t sharp and precise, the model can look messy and be difficult to fold in later steps.
* **How to Avoid It:** Use your fingernail or a bone folder (if you have one) to firmly run along each fold. Imagine you’re pressing the paper into the crease. Don’t be afraid to apply pressure! When I say “crease firmly,” I really mean it.
Pitfall 2: Misaligned Corners and Edges
* **The Problem:** If you’re not careful about lining up corners with corners and edges with edges, your bee will look lopsided.
* **How to Avoid It:** Take your time! Before you make a crease, hold the paper in place and double-check that the corner you’re bringing is exactly where it should be, or the edge is perfectly aligned with the target edge or crease. It’s better to unfold and re-crease than to have a wonky fold.
Pitfall 3: Forcing Folds or Ripping Paper
* **The Problem:** Sometimes, especially with thicker paper or when a step feels difficult, we can get a bit rough, leading to tears or awkward shapes.
* **How to Avoid It:** Patience is key! If a fold isn’t going smoothly, re-examine the instructions and your paper. Are you sure you’re folding the correct layer? Is the paper oriented correctly? Sometimes, a gentle coaxing and understanding of how the paper *wants* to bend can help. Don’t rip the paper; if it feels like it’s going to tear, there’s likely a misunderstanding of the fold or the paper is too thick for that particular step.
Variations: Making Your Bee Unique
The beauty of this craft is how easy it is to personalize!
Size Variations
* **Larger Bees:** Use a larger square of paper for the head and wings, and a wider cardboard tube (like a paper towel roll cut down).
* **Smaller Bees:** Use smaller paper squares and a thinner tube (perhaps cut from a gift wrap roll).
Paper Pattern and Color Variations
* **Striped Bees:** Use paper with a striped pattern for a classic bee look, or even alternate colors for the head and wings.
* **Patterned Paper:** Floral, polka-dot, or even geometric patterned papers can create wonderfully unique bees.
* **Color Combinations:** Don’t limit yourself to yellow and black! Think about rainbow bees, patriotic bees, or even bees in your favorite colors.
Displaying or Gifting Your Flying Bee
Once your bee is complete, it’s time to show it off!
Display Ideas
* **Mobile:** String several bees together to create a whimsical mobile that can hang from the ceiling.
* **Desk Buddy:** Place your bee on your desk or shelf as a cheerful decoration.
* **”Flying” Display:** Gently bend the wings forward and place the bee on a slightly angled surface so it looks like it’s about to take off.
* **Staged Scenes:** Use your bees as characters in a small diorama or play scene.
Gifting Ideas
* **Party Favors:** These make fantastic party favors for children’s birthdays.
* **Small Gifts:** Attach a bee to a gift for a unique and handmade touch.
* **Get Well Soon/Thinking of You:** A cheerful bee can brighten someone’s day.
* **Classroom Projects:** A great craft to do with a class for a spring or insect theme.
I hope you’ve enjoyed this tutorial and have a wonderful time creating your own swarm of flying bees! Happy folding!
Conclusion
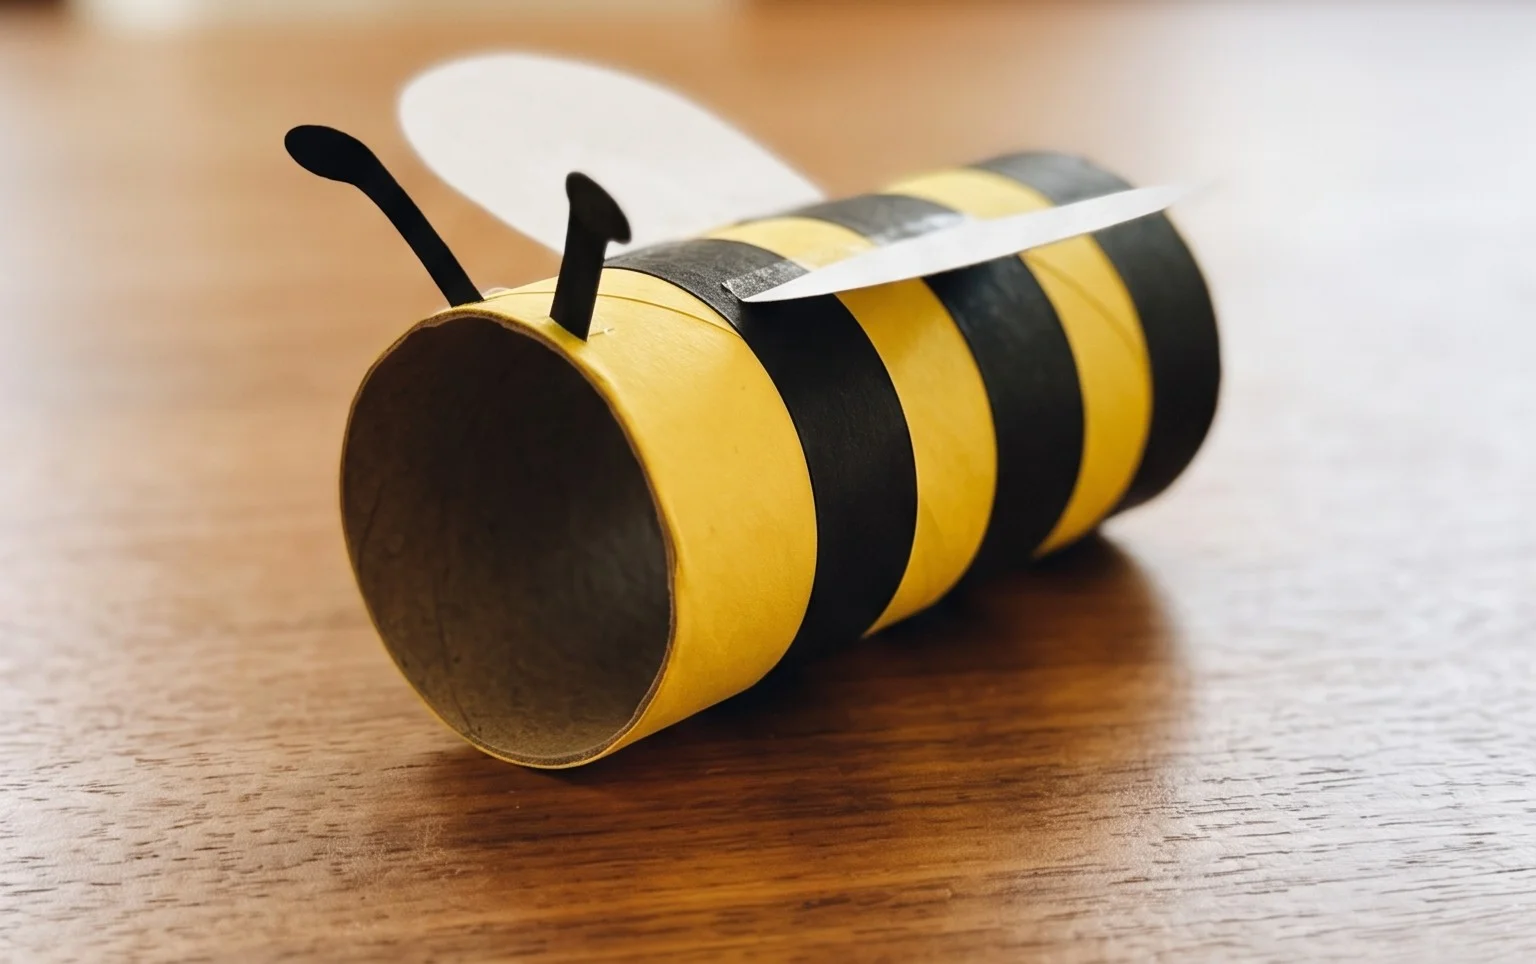
Congratulations on creating your very own Cardboard Tube Flying Bee! We hope you had a buzzing good time crafting this little pollinator. Don’t worry if your first attempt wasn’t perfect; every craft is a learning experience, and practice makes perfect. We encourage you to fly your bee around and enjoy its cheerful presence! We’d love to see your finished creation, so feel free to share it with friends and family. For your next adventure, why not try making a ladybug or a butterfly using the same technique? And remember, there are always more wonderful paper projects waiting to be discovered!
