Easy Coffee Filter Dancer Origami: Step-by-Step Craft
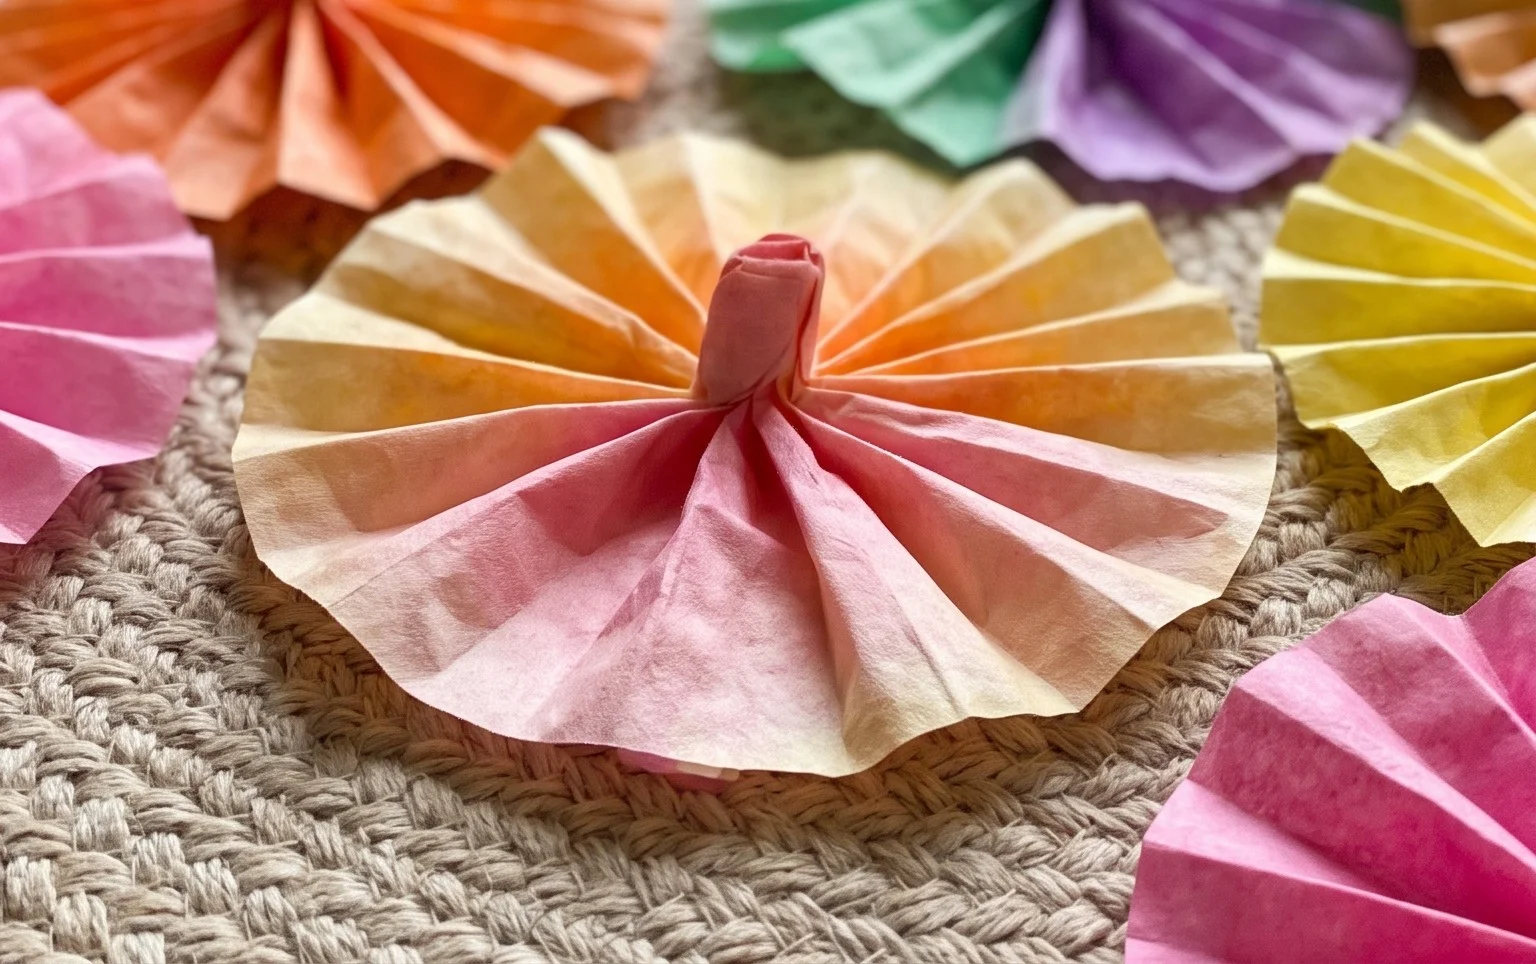
How to Make Coffee Filter Dancers! Get ready to create some truly magical, fluttering figures with just a few simple coffee filters. These charming dancers, with their delicate, layered skirts and whimsical heads, look like they’re about to pirouette right off your crafting table. They’re perfect for absolute beginners, a fun rainy-day activity for kids, or even a unique and charming decoration for parties and holidays. You can whip up a whole troupe in under 10 minutes each!
In this tutorial, I’ll guide you step-by-step through the easy folding and shaping techniques to bring your very own coffee filter dancers to life. We’ll learn how to give them their distinct dancer-like posture and how to add those adorable little heads. Let’s grab some coffee filters and get folding!
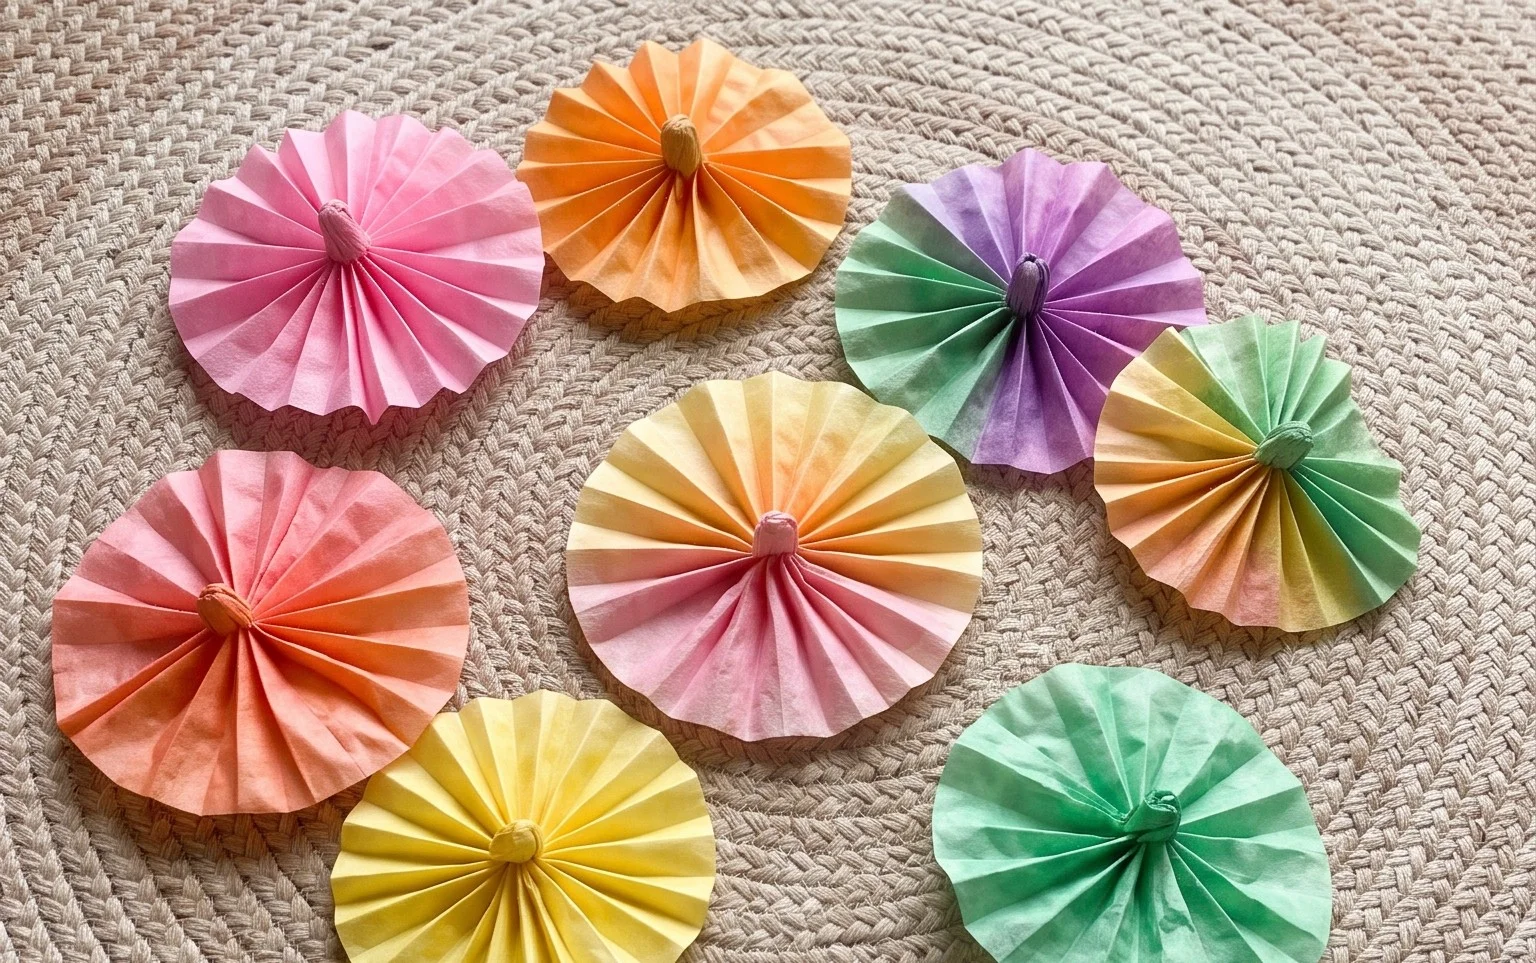
How to Make Coffee Filter Dancers: A Joyful Origami Adventure
Hello there, fellow paper enthusiasts! Today, we’re diving into a wonderfully simple and incredibly charming origami project: the Coffee Filter Dancer. These delightful little creations are not only fun to make but also possess a magical, almost ethereal quality when they move. They’re perfect for beginners, a relaxing craft for a quiet afternoon, or even a lovely handmade gift. So, let’s gather our materials and get ready to bring these paper dancers to life!
Choosing Your Paper: The Foundation of Your Dancer
The beauty of the Coffee Filter Dancer is that it can be made from readily available materials, but the “paper” we use, in this case, is actually a standard paper coffee filter.
- Type: You’ll want to use standard, unbleached or bleached paper coffee filters. The pleated structure of the filter is actually part of what gives the dancer its unique form.
- Weight: Coffee filters are generally quite thin and lightweight, which is ideal for this project. This thinness allows for easy folding and creates a delicate, flowing appearance.
- Size: Most standard basket-style coffee filters (the cone-shaped ones) will work perfectly. You can also use flat-bottomed filters, but you might need to trim them slightly to get the right circular shape once opened.
- Single or Double Sided: For coffee filters, this isn’t really a concern as they are typically a uniform color throughout. If you were to adapt this to regular paper, you’d want to consider if you want a different color on each side.
It’s worth noting that while we call it “origami,” we’re bending the traditional rules a bit by using a coffee filter. This makes it accessible and forgiving, which is wonderful for beginners!
The Base Folds: Building the Structure
Before we start folding our dancer, we’ll need to perform a couple of basic folds to prepare our coffee filter. These folds are simple but crucial for creating the foundation of our dancer’s body.
The primary fold we’ll be using is a simple valley fold. A valley fold is when you fold a piece of paper in half, bringing two edges or corners together, and the crease forms a “valley” shape when viewed from above.
Let’s start by preparing our coffee filter:
- Gently open up one coffee filter. You’ll see it has a pleated, somewhat conical shape.
- Lay the opened filter flat on your work surface. It might not lie perfectly flat, and that’s okay. The pleats will help with the dancer’s movement later.
- Now, we need to make a central fold. Imagine the filter is a circle with a point at the bottom and an open edge at the top. We’re going to fold it in half like a taco. Bring the two sides of the filter together. Specifically, bring the right edge of the filter to meet the left edge. The point at the bottom of the filter should meet the center of the top open edge. Press down firmly to create a crisp crease all the way down the center.
- Now, unfold the filter. You should have a nice, clear vertical crease running down the middle.
- Next, we’re going to fold it in half the other way. This time, bring the top open edge down to meet the bottom point. Again, press down firmly to create a crisp horizontal crease.
- Unfold the filter one last time. You should now have two intersecting creases, forming a ‘+’ shape on your coffee filter. These creases will act as our guides for the subsequent folds.
Making these folds cleanly is important because they will help define the shape of your dancer and ensure that the subsequent folds are even. Don’t worry if your creases aren’t absolutely perfect; the organic nature of the coffee filter will still allow for a beautiful result.
The Fold Sequence: Bringing Your Dancer to Life
Now for the fun part – transforming our creased coffee filter into a dancing figure! I’ll guide you through each step, and remember to be patient with yourself.
- Start with your coffee filter lying flat, with the ‘+’ crease visible. Make sure the “top” (the wider, open edge) is facing away from you, and the “bottom” (the point) is facing towards you.
- We’re going to work with the left side of the filter first. Take the bottom-left corner of the filter and bring it up to meet the center vertical crease. The point of the bottom-left corner should land directly on the vertical crease, about halfway up the filter. Press down to create a new diagonal crease.
- Now, take the top-left edge of the filter and fold it inwards so that it aligns perfectly with the center vertical crease. The fold should start from the point you just created and extend upwards. Press down to make a sharp crease.
- You should now have a shape that looks a bit like a kite or an arrowhead on the left side of your filter.
- Repeat steps 2 and 3 on the right side of the filter. Take the bottom-right corner and bring it up to meet the center vertical crease, about halfway up. Crease it.
- Then, take the top-right edge and fold it inwards to align with the center vertical crease. Crease it.
- Your coffee filter should now resemble a diamond shape with two pointed “wings” extending outwards.
- Now, let’s fold the entire model in half along that original center vertical crease. Bring the right side of the diamond over to meet the left side. The two folded-in edges should be on the inside of this fold. Press down firmly to create a new, strong central crease. You should now have a long, thin shape with two points at the top and a single point at the bottom.
- We’re going to create the dancer’s “head” and “body.” Take the bottom point of this folded shape and fold it upwards. You can choose how far up you fold it – a shorter fold will give you a more compact dancer, while a longer fold will make it more elongated. A good starting point is to fold it up so the tip of the point meets the base of the “wings” you folded in earlier. Crease this fold very well.
- Now, fold the entire model in half one more time, but this time, fold it away from you along the previous central crease. Imagine you are closing a book. This creates the final body of the dancer. Press down very firmly.
- To make the dancer stand and move, gently pull the two “wings” apart. You’ll see the pleats of the coffee filter allow them to spread out, giving the dancer its characteristic form and movement. You can adjust how far you spread them to change the dancer’s pose.
Common Pitfalls and How to Avoid Them
Even with simple folds, beginners can sometimes run into a few snags. Don’t worry, these are very common, and with a little attention, you can overcome them!
- Folds Not Meeting Cleanly: This is often caused by not flattening the coffee filter perfectly at the start, or by not pressing the creases firmly enough.
- To Avoid: Take a moment at the beginning to lay your filter as flat as possible. When making a crease, use your fingernail or a bone folder (if you have one) to really “sharpen” the fold. Ensure the edges or corners you’re bringing together are perfectly aligned before you press down.
- The Dancer Not Opening Up Properly: If your dancer looks flat or the “wings” don’t spread, it’s likely because the internal folds weren’t made with enough definition, or the final folds are too tight.
- To Avoid: Revisit steps 2 and 3 (the kite folds) and make sure those creases are strong. Also, in step 8, when you fold the bottom point up, ensure that crease is very firm. When you do the final fold in step 9, try not to crease *too* tightly. You want a defined body, but not so much that the pleats can’t expand.
- The Dancer Being Too Floppy or Unstable: Sometimes, the dancer might not hold its shape well.
- To Avoid: This usually comes down to firm creasing. Go back over all your folds and press them down again, especially the central vertical fold and the fold that creates the body. A well-creased model will hold its shape much better.
Remember, the beauty of these dancers is their whimsical nature. They don’t need to be perfectly symmetrical to be charming!
Varying Your Dancers: A Splash of Creativity
The basic Coffee Filter Dancer is wonderful, but you can easily put your own creative spin on it!
- Size: While standard coffee filters are a good starting point, you can experiment with different sizes. Larger basket filters will yield bigger dancers, and you can even try trimming a large round filter into a smaller circle before folding.
- Paper Pattern: This is where you can really have fun!
- Decorated Filters: If you have a stash of plain white filters, you can decorate them *before* you start folding. Use markers, watercolors, or even stamps to add patterns, colors, or faces to the filter. Let them dry completely before folding.
- Alternative Papers: While coffee filters are ideal, you can adapt this fold to other thin papers. Try thin tissue paper, patterned cupcake liners, or even very thin craft paper. You might need to adjust the folding slightly for different paper weights and textures.
- Color: Beyond the natural beige of unbleached filters, you can find bleached white ones. If you’re using other papers, the color possibilities are endless! Imagine a whole rainbow of dancers!
Displaying and Gifting Your Dancers
Once you’ve made your beautiful Coffee Filter Dancers, what do you do with them? The possibilities are as delightful as the dancers themselves!
- Mobile Magic: String several dancers together at different lengths and hang them from a hoop or a branch to create a whimsical mobile. They’ll twirl and sway with the slightest breeze, looking like they’re dancing in the air.
- Table Decorations: Place them around your table for a party or a special meal. They add an unexpected touch of handmade charm.
- Gifting: These make wonderfully personal and affordable gifts.
- Gift Toppers: Tie a dancer onto the top of a present for a unique and eye-catching embellishment.
- Party Favors: If you’re having a small gathering, a collection of these dancers can be a charming party favor for guests to take home.
- “Thinking of You” Gifts: A simple dancer, perhaps with a little hand-drawn face, can be a lovely way to send a smile to someone.
- Seasonal Decor: Imagine a garland of red and green dancers for Christmas, or pastel-colored ones for Easter!
Making Coffee Filter Dancers is a truly joyful and rewarding experience. They’re a testament to how simple materials and straightforward folds can create something truly magical. I hope you’ve enjoyed this tutorial and have a whole troop of dancers ready to twirl! Happy folding!
Conclusion
Congratulations on creating your very own coffee filter dancers! Don’t worry if your first attempt isn’t perfect; every artist needs practice, and yours are still wonderfully unique creations. We hope you had fun bringing these charming figures to life. Once you’re done adnon-alcoholic miring them, why not share your delightful coffee filter dancers with friends and family? They make fantastic, handmade gifts! For your next crafting adventure, consider trying a slightly different sized coffee filter for a troupe of dancers in varying heights, or perhaps adding a touch of glitter for some extra sparkle. There are so many more exciting paper projects waiting for you to discover, so keep exploring and creating!
